Vendor Last Payment Activity Report
Financial Management > Reports > Accounts Payable > Vendor Last Payment Activity Report
To assist you in determining whether to inactivate certain vendors, the Vendor Last Payment Activity Report has been added to the Accounts Payable Reports menu:
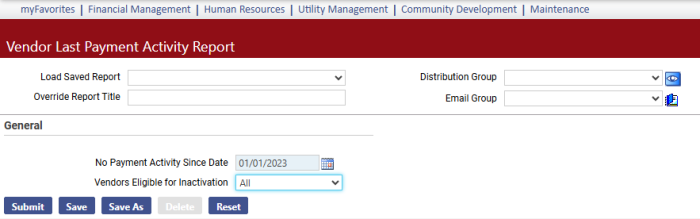
In the No Payment Activity Since Date field, select the date on or after which no payment activity has occurred.
From the Vendors Eligible for Inactivation dropdown, select whether to show all vendors who are eligible and ineligible for inactivation (All), eligible vendors only (Yes) or ineligible only (No).
After completing selections, click Submit to generate a grid of results that can be filtered and sorted as necessary and exported to Excel:
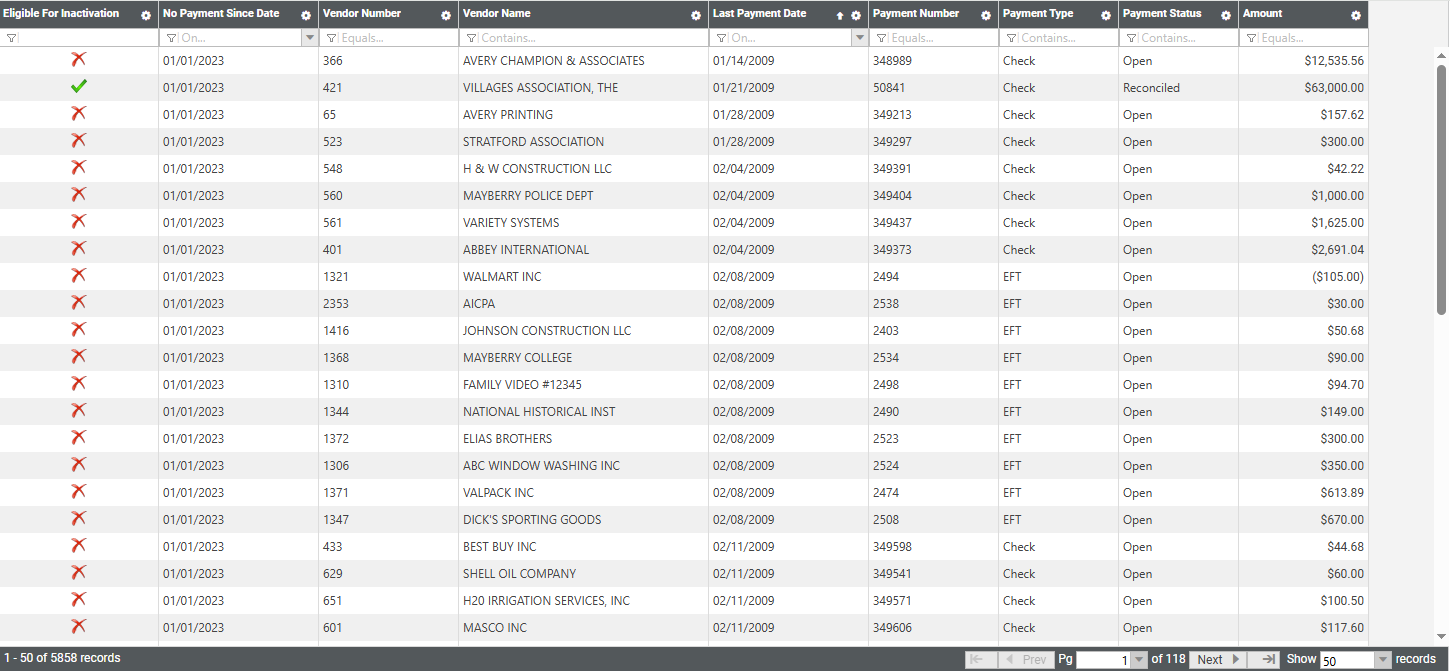
By default, the grid is sorted by Last Payment Date, from earliest to latest.
In the Eligible for Inactivation column on a report run for All, a green check mark identifies a vendor who is eligible for inactivation, while a red X identifies one who is not.
Find out in Vendor Service why a vendor is ineligible for inactivation:
- Navigate to Maintenance > new world ERP Suite > Procurement > Vendor Service.
- In the search panel, type the vendor Number.
- Select the vendor.
-
On the General tab, click Edit. The Vendor General page displays:
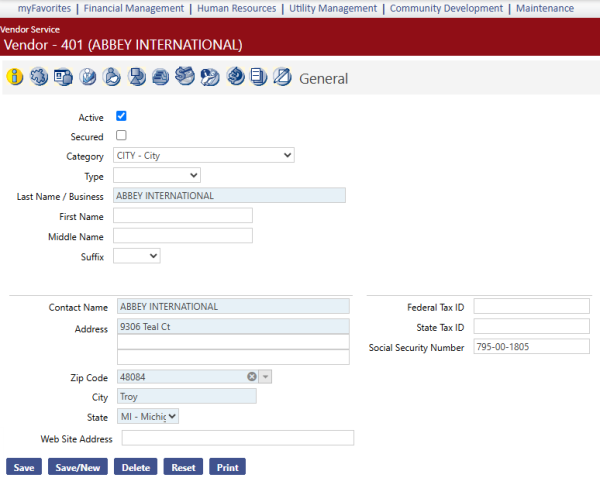
- Clear the Active checkbox.
-
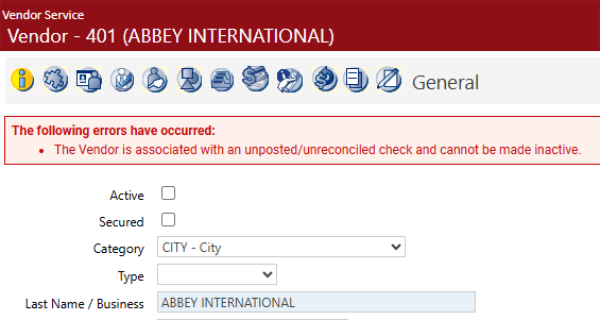
Click Save. An error message displays, providing the reason for ineligibility:
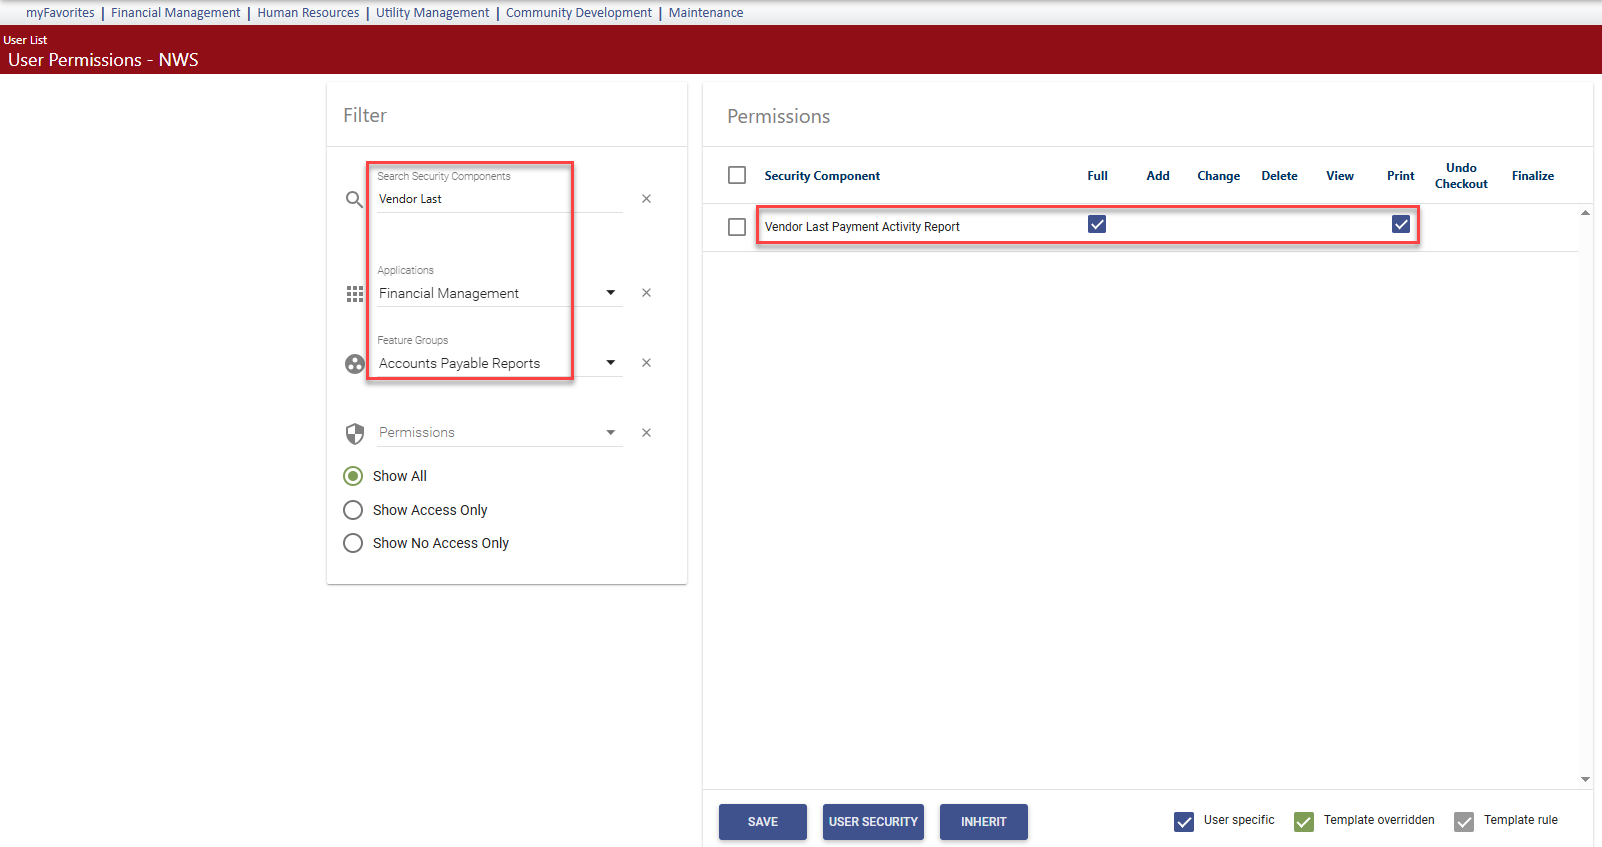
For this report to display on a user's Reports menu, the user needs permission to the Vendor Last Payment Activity Report security component:
- Navigate to Maintenance > new world ERP Suite > Security > Users. The User List page displays.
- Use the filter in the User Name column to search for the user.
- Select the user's row.
- Click Permissions. The User Permissions page displays, containing a grid of security components and a filter panel.
- In the Applications filter, select Financial Management.
- In the Feature Group filter, select Accounts Payable Reports.
-
In the Search Security Components filter, type Vendor Last. The grid refreshes to display the Vendor Last Payment Activity Report component:

- Select Full permission.
- Click Save.
- For the permission to take effect, the user must log off and log back onto the system.